Microsoft 365 allows you to create shared mailboxes without additional cost. Indeed, today, “shared mailboxes” do not need any license to operate.
Here’s an extract from Microsoft’s documentation on this topic:

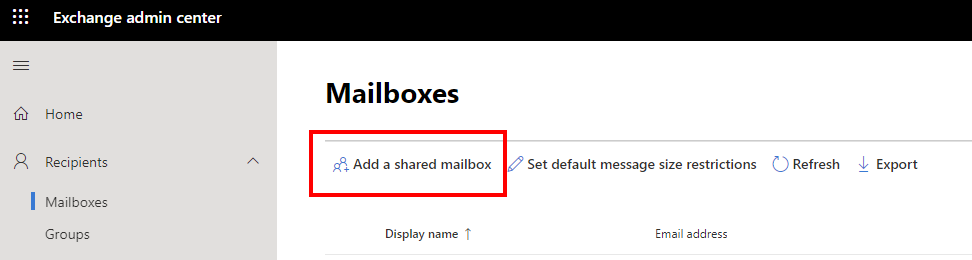
The creation of “shared mailboxes” is done via the management interface of Exchange Online.
Creating a “shared mailbox” is simple and will create an AzureAD account with which it is recommended not to connect.
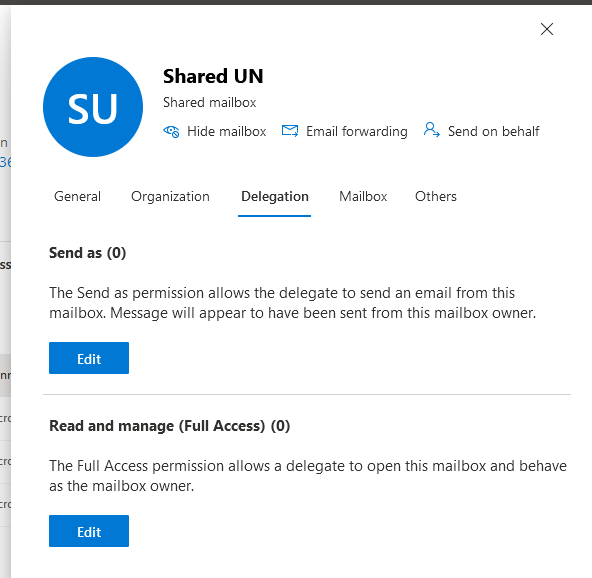
Once the “shared mailbox” is created, it must be positioned to determine who will have the right to access it. There are two rights: the right to access the contents of the mailbox and the right to use the email address of the mailbox (to send emails in his name).
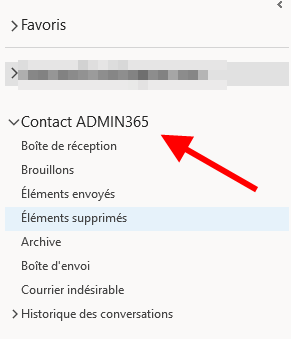
When a user (who has an MS365 license and an Exchange Online mailbox) has the right “Full Access” on a “shared mailbox”, he can access it from his Outlook (heavy client) and from the MS365 Webmail.
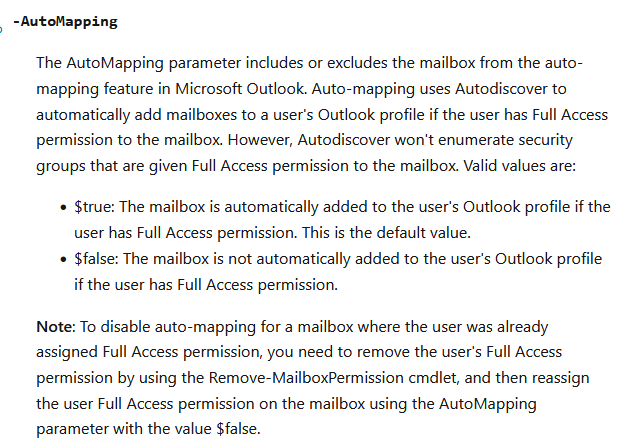
By default the “Full access” right is added with the option “automapping” by the interface that uses the equivalent of the add-mailboxepermission PowerShell command
https://docs.microsoft.com/en-us/powershell/module/exchange/add-mailboxpermission?view=exchange-ps
This option means that, via Outlook (heavy client), the “shared mailbox” will automatically appear in the left part of Outlook, below the user’s mailbox. This will be done at the next “autodiscover” made by Outlook (and therefore not obliged to relaunch Outlook unless the user is in a hurry to access the shared mailbox).

FYI: It is also possible in powershell to give a “full access” right without the option “automaping” by specifying the option -automapping $false. This is essential if, for technical reasons, an account has to access many mailboxes knowing that the principle of “automapping” is limited to 15 shared mailboxes per user. So if you set the “full access” right on many mailboxes for a user, a PowerShell warning message will alert you to this limit.
This “automaping” feature is very convenient:
- When a “full access” right is added to a shared mailbox, the mailbox will appear in the Outlook of the user who is the beneficiary of the right.
- When a “full access” right is removed from a shared mailbox, the box will disappear into the Outlook of the user who no longer has the right.
In OWA the user will not automatically find his shared mailboxes.
Traditionally it has to connect to it using the “Open another mailbox” menu at the top right in the Webmail but this is not practical. The mailboxes are displayed in separate windows and each time the browser reopens, the process of connecting to shared mailboxes must be restarted. Another method is to add the shared mailbox as a “shared folder” in the Webmail.
To do this, you have to click right on “Folders” in the Webmail and choose “Add a shared folder”
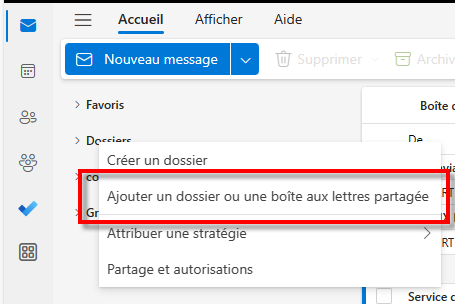
After specifying the email address of the shared mailbox, it will be displayed in the left part of the Webmail:
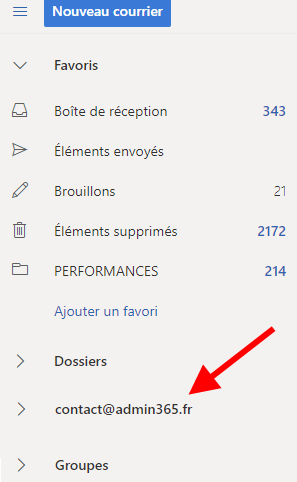
With this method the shared mailbox will always be displayed in the Webmail below the user’s mailbox, much like what is displayed in Outlook (heavy client). This method is very convenient.
By Lionel TRAVERSE
Microsoft 365 Certified / MVP Microsoft 365 & Graph