HTTP Strict Transport Security (HSTS) is a web security policy mechanism that helps to protect websites against various types of attacks, such as man-in-the-middle (MITM) attacks, session hijacking, and protocol downgrade attacks. When a website is configured to use HSTS, it instructs web browsers to only communicate with the server over HTTPS (HTTP Secure) connections, ensuring that all data transmitted between the browser and the server is encrypted and secure.
Here’s how HSTS works:
- Enabling HTTPS: First, the website must be configured to support HTTPS, which involves obtaining an SSL/TLS certificate and configuring the web server to use HTTPS for all connections.
- HSTS Header: Once HTTPS is enabled, the website sends an HTTP Strict Transport Security (HSTS) header to the client browser along with its HTTPS responses. This header includes directives specifying the duration for which the browser should enforce HTTPS and whether subdomains should also be included.
- Browser Cache: Upon receiving the HSTS header, the browser stores this information locally in its HSTS cache. It associates the domain name with the HSTS policy and enforces HTTPS for subsequent connections to that domain. This means that even if the user types “http://” in the address bar or clicks on HTTP links, the browser automatically redirects them to the HTTPS version of the site.
- Expiration and Renewal: The HSTS policy includes a “max-age” directive, which specifies the duration in seconds for which the browser should enforce HTTPS. After this duration expires, the browser will stop enforcing HSTS for that domain. However, the website can renew the HSTS policy by sending a new HSTS header with an updated “max-age” value.
- Preloading: Websites can also opt-in to HSTS preloading, where their domain is added to a browser’s HSTS preload list. This ensures that even users visiting the site for the first time will automatically use HTTPS, without needing to receive the initial HSTS header.
It’s important to note that while HSTS works effectively with web browsers, it does not apply to other client applications such as Outlook. Therefore, additional measures may be necessary to ensure secure communication with email clients.
Configuration with Exchange 2019
HSTS configuration is done at the level of an IIS site. With Exchange 2019, the Exchange front-end site is managed by IIS on Windows 2019 or Windows 2022. With these versions of Windows, it is possible to configure HSTS using PowerShell or with the graphical interface.
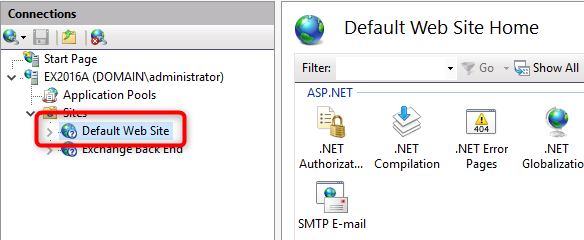
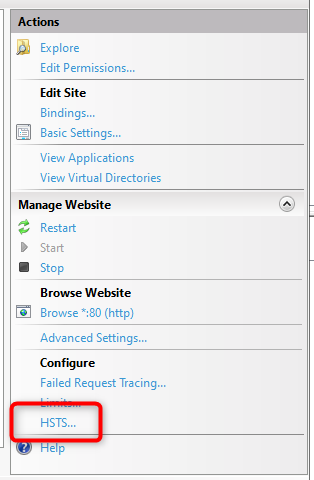
In the graphical interface, simply click on the ‘default web site’ in the IIS administration console, and an HSTS menu will be available under the ‘actions’ menu at the bottom right.
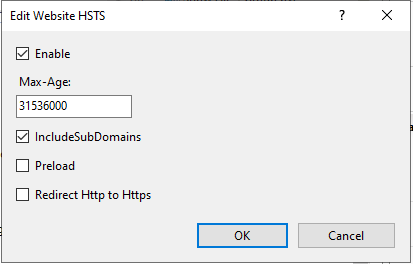
It is then possible to enable HSTS by setting the browser cache duration (max-age value). It is generally recommended to set a value between 1 year (31536000) and 2 years (63072000).
It is also possible to apply this configuration in PowerShell with the following commands (example without preload list option):
Import-Module IISAdministration
Reset-IISServerManager -Confirm:$false
Start-IISCommitDelay
$sitesCollection = Get-IISConfigSection -SectionPath "system.applicationHost/sites" | Get-IISConfigCollection
$siteElement = Get-IISConfigCollectionElement -ConfigCollection $sitesCollection -ConfigAttribute @{"name"="Default Web Site"}
$hstsElement = Get-IISConfigElement -ConfigElement $siteElement -ChildElementName "hsts"
Set-IISConfigAttributeValue -ConfigElement $hstsElement -AttributeName "enabled" -AttributeValue $true
Set-IISConfigAttributeValue -ConfigElement $hstsElement -AttributeName "max-age" -AttributeValue 31536000
Set-IISConfigAttributeValue -ConfigElement $hstsElement -AttributeName "includeSubDomains" -AttributeValue $trueStop-IISCommitDelay
Remove-Module IISAdministrationThe HSTS configuration takes effect immediately. There is no need to restart/reset IIS.
Note: You can find more information about the preload list option in the Microsoft documentation.
Configuration with Exchange 2016
With Exchange 2016 on Windows 2016, it is only possible to configure HSTS using PowerShell commands. The IIS graphical interface on Windows 2016 does not display the HSTS option. Below are the commands to apply HSTS to the Exchange front-end site with a max-age value of 1 year.
Import-Module IISAdministration
Reset-IISServerManager -Confirm:$false
Start-IISCommitDelay
$iisConfig = Get-IISConfigSection -SectionPath "system.webServer/httpProtocol" -CommitPath "Default Web Site" | Get-IISConfigCollection -CollectionName "customHeaders"New-IISConfigCollectionElement -ConfigCollection $iisConfig -ConfigAttribute @{"name"="Strict-Transport-Security"; "value"="max-age=31536000; includeSubDomains";}Stop-IISCommitDelay
Remove-Module IISAdministrationThe HSTS configuration takes effect immediately. There is no need to restart/reset IIS.
You can verify the configuration with this PowerShell command:
Get-IISConfigSection -SectionPath "system.webServer/httpProtocol" -CommitPath "Default Web Site" | Get-IISConfigCollection -CollectionName "customHeaders"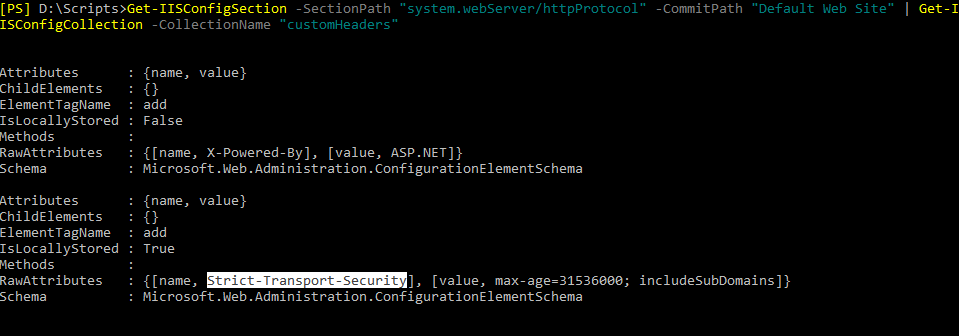
Note: With Exchange 2016 installed on Windows 2012R2, the PowerShell commands are different:
Import-Module WebAdministration
Add-WebConfigurationProperty -Filter "system.webServer/httpProtocol/customHeaders" -PSPath "IIS:\Sites\Default Web Site" -Name . -AtElement @{name="Strict-Transport-Security"} -Value @{name="Strict-Transport-Security";value="max-age=31536000; includeSubDomains"}
Note: You can find more information about the preload list option in the Microsoft documentation.
How to verify and test the configuration
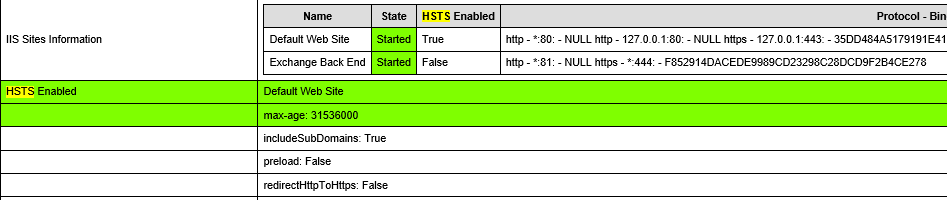
On your Exchange servers you can use the Microsoft HealthCheck powershell script to verify the activation of HSTS feature:
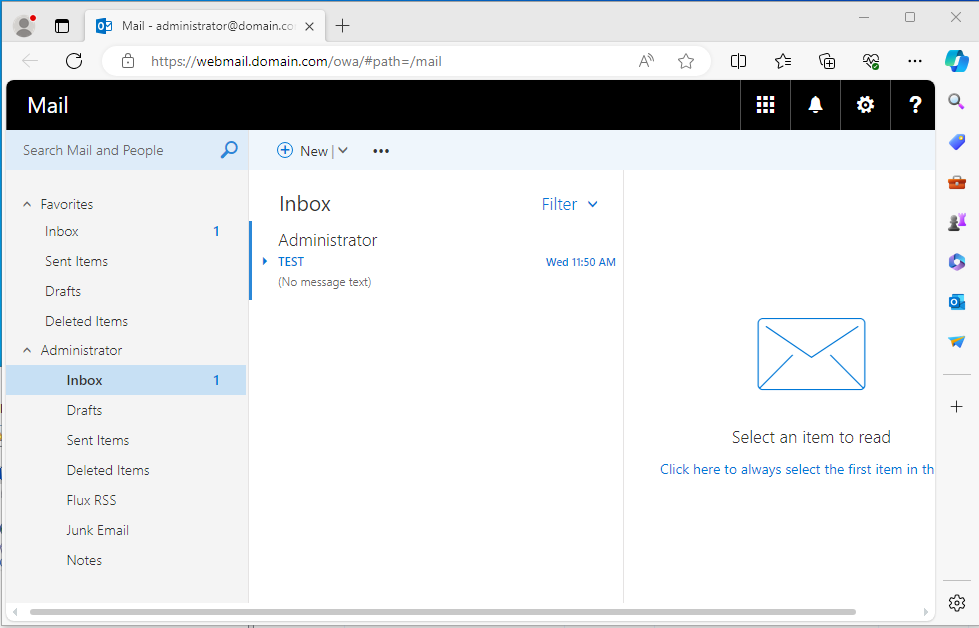
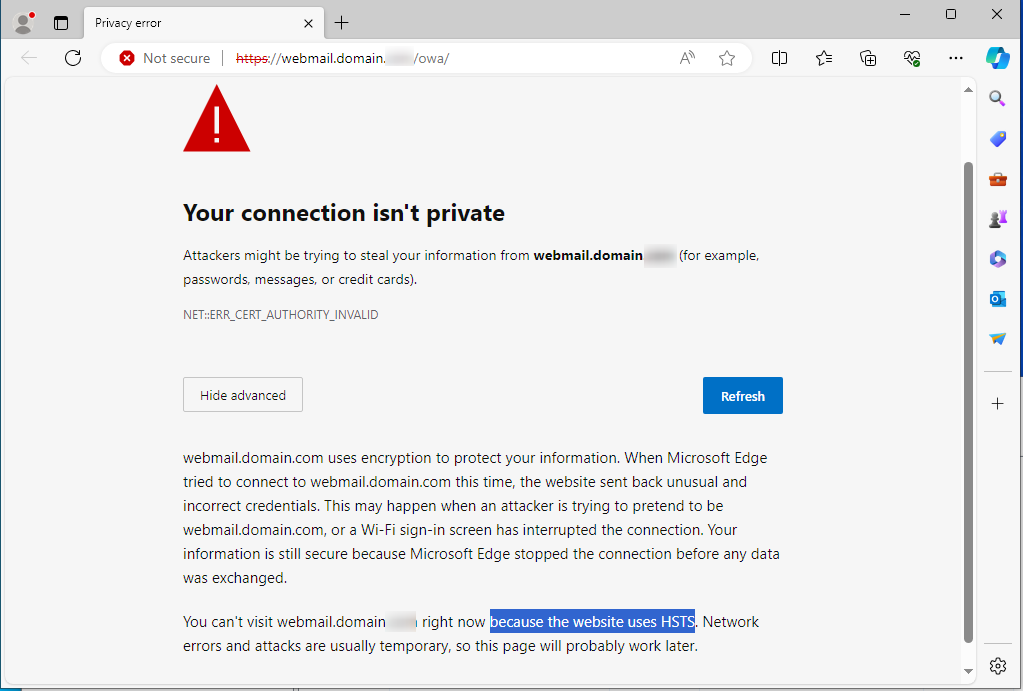
Furthermore, to test the HSTS configuration with a client, you can simply use EDGE or CHROME.
Access the on-premise Exchange webmail for the first time via HTTPS.
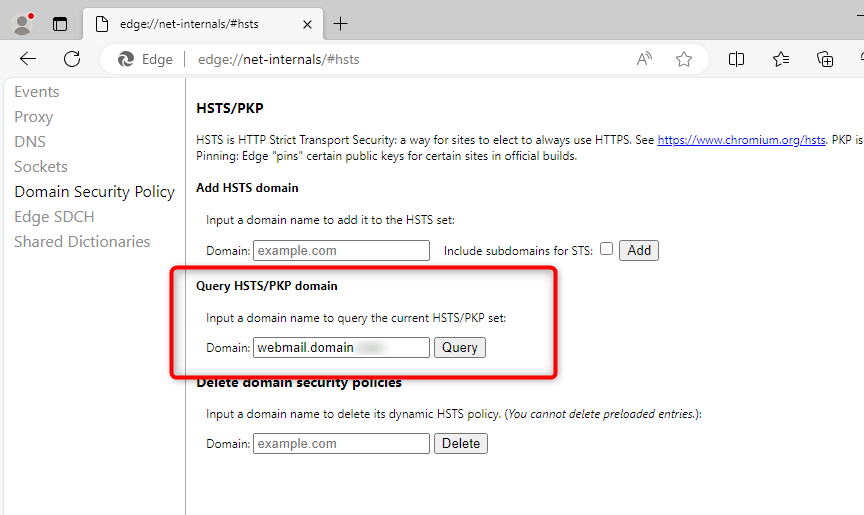
After this initial access, you can verify that your webmail domain is in the browser’s HSTS cache with a duration of 1 year. To do this, use the link chrome://net-internals/#hsts or edge://net-internals/#hsts. You can then search in the HSTS cache the domain name of your webmail. You will find technical information such as the max-age.
The following fields must be present in the cache entry:
dynamic_sts_domain: your_webmail_domain
dynamic_upgrade_mode: FORCE_HTTPS
dynamic_sts_include_subdomains: true
dynamic_sts_observed: date_input_hsts_cache
dynamic_sts_expiry: date_input_hsts_cache + max-age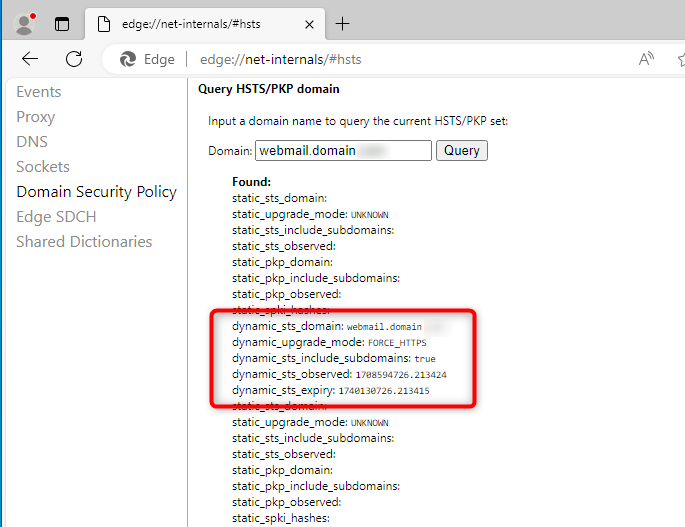
It is possible to convert the HSTS cache dates from Unix format to Windows format using PowerShell:
$MaxAge = "1740130726.213415"
$WindowsDate=((Get-Date 01.01.1970)+([System.TimeSpan]::fromseconds($MaxAge))).ToLocalTime()
$WindowsDate
To test the triggering of HSTS protection on the browser’s side, you can remove the authority that generated the certificate for your Exchange webmail on a client workstation. Consequently, the certificate presented by your webmail will not be trusted by the workstation. Without HSTS, the browser would display a security warning while still allowing the user to connect by clicking ‘advanced/proceed anyway.’ However, with HSTS enabled, the user cannot bypass the security warning and will be unable to connect.
Important note: With HSTS enabled, if your certificate expires on the Exchange server or on the frontend load-balancer, users will be unable to access the webmail because the browsers’ HSTS function will block access.
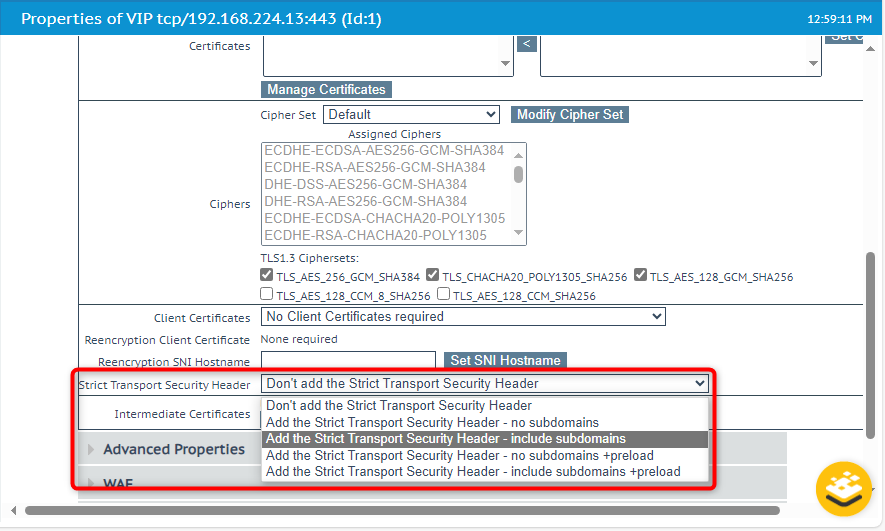
Note: Configuration with a load-balancer
Regardless of the Exchange configuration, it’s important to note that the HSTS function can also be implemented by the load balancer that exposes HTTPS services with SSL-BRIDGING. In this scenario, since the load balancer can analyze and modify packets (as part of using a WAF), it can enable HSTS feature.
By Lionel TRAVERSE
Microsoft 365 Certified / MVP Microsoft 365 & Graph