The Simple Mail Transfer Protocol (SMTP) remains a standard method for sending emails from applications and systems. It is widely supported and commonly used for automated notifications, alerts, and transactional messages.
Azure Communication Services provides an SMTP endpoint that supports OAuth2.0 and Basic Authentication, allowing existing applications to send emails without significant changes to their current implementation. This enables straightforward integration using familiar libraries and tools.
Using this approach removes the need to rely on on‑premises Exchange infrastructure for email delivery. By delegating message transmission to Azure Communication Services, email sending can be externalized while maintaining compatibility with SMTP based workflows.
It also allows a clear separation between application SMTP traffic and user messaging hosted on Microsoft 365, helping to isolate use cases and avoid mixing operational email flows with end user communications.
This article describes how to configure and use SMTP with Basic Authentication in Azure Communication Services to send emails, focusing on the required settings, authentication method, and integration steps.
Create a email communication service
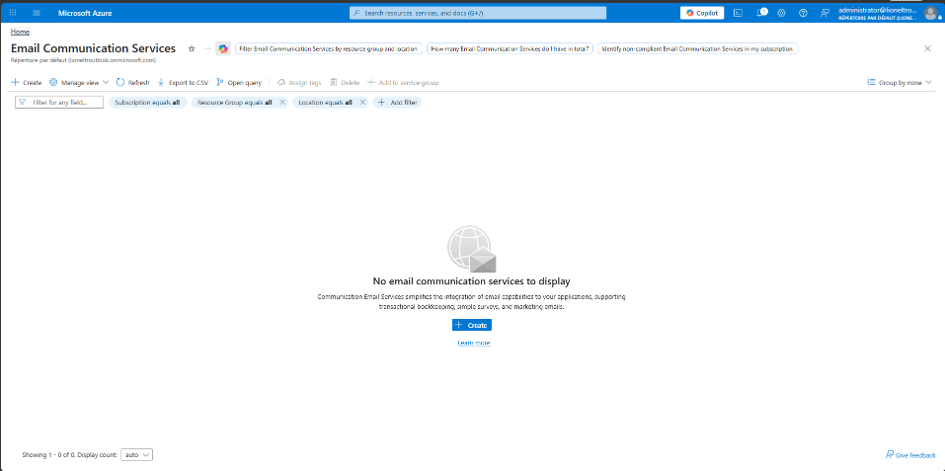
Start by creating an Email Communication Service in the Azure portal.
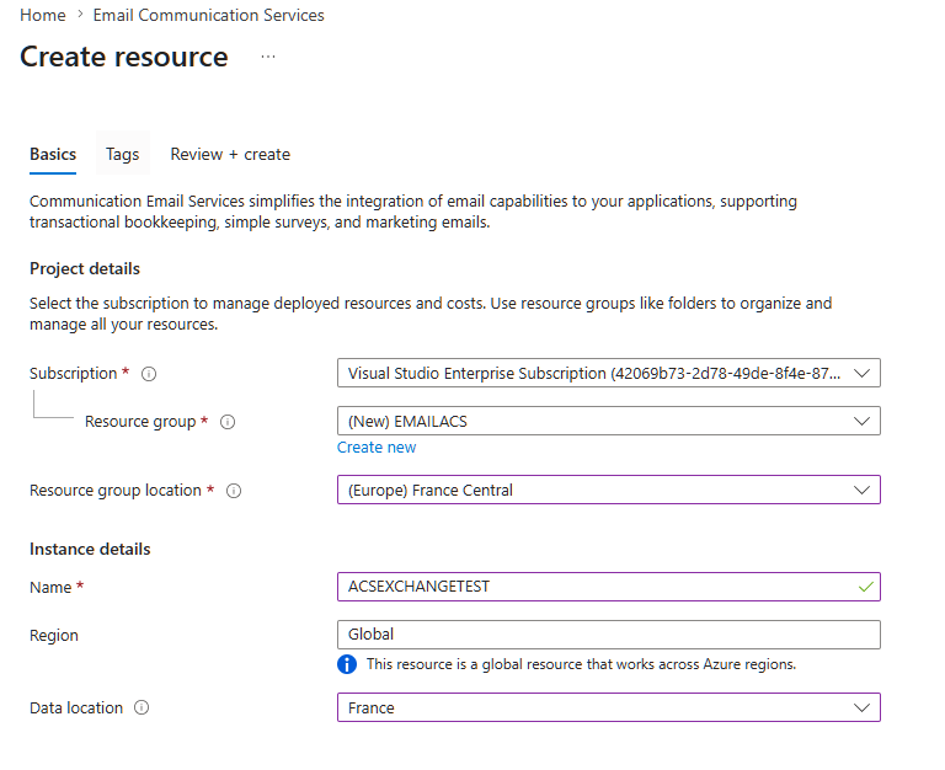
Define the name, select the subscription to use, choose or create the resource group, and set the region.
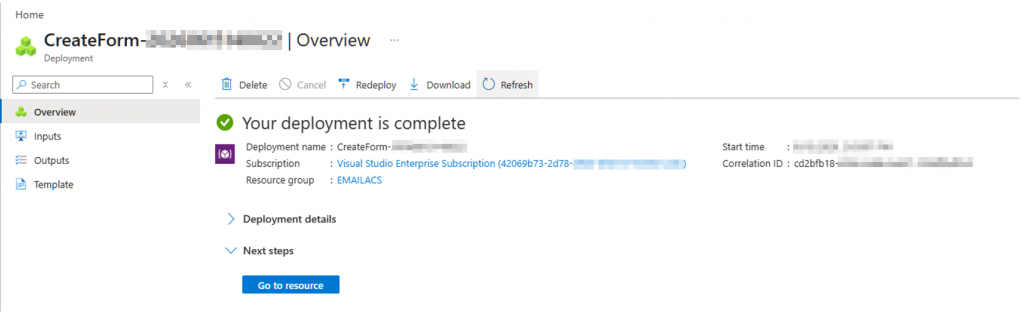
Add custom domain
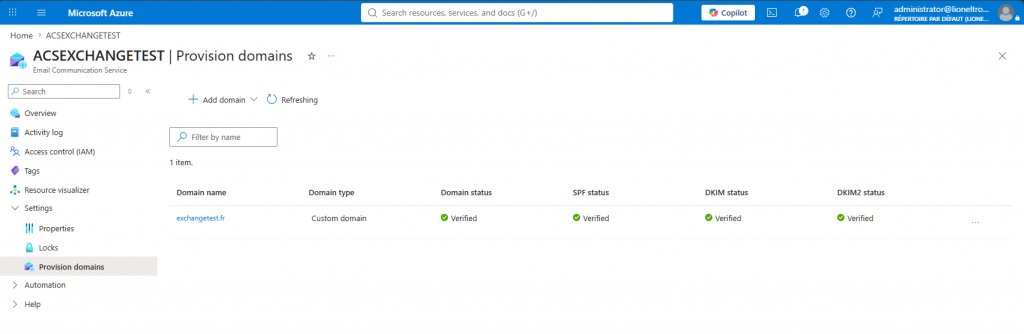
For the second step, add your email domain to this resource.
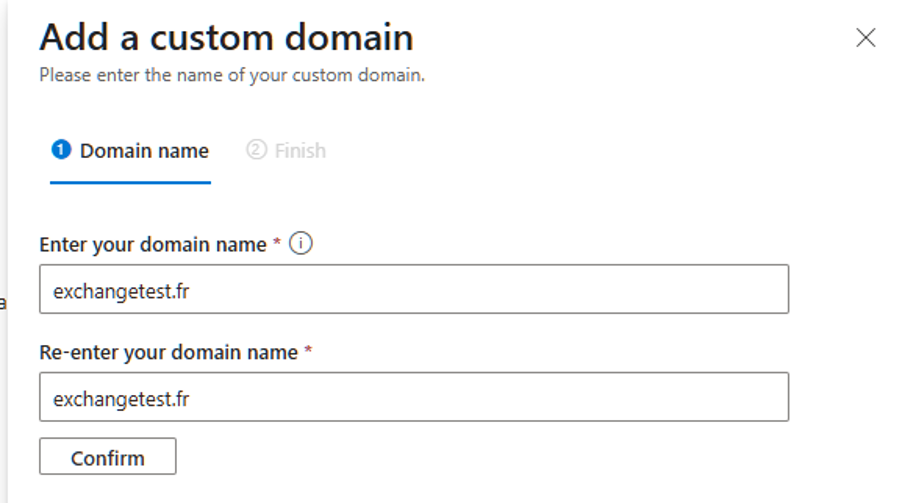
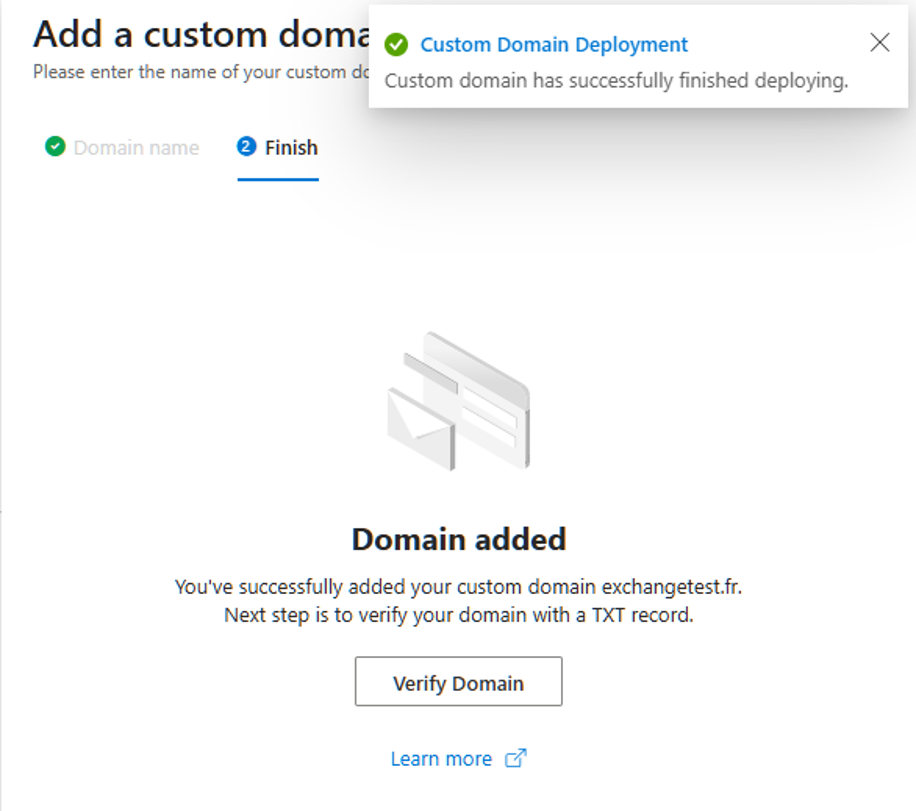
Use a TXT DNS record to verify the domain, just as you would when adding a domain to a Microsoft 365 tenant.
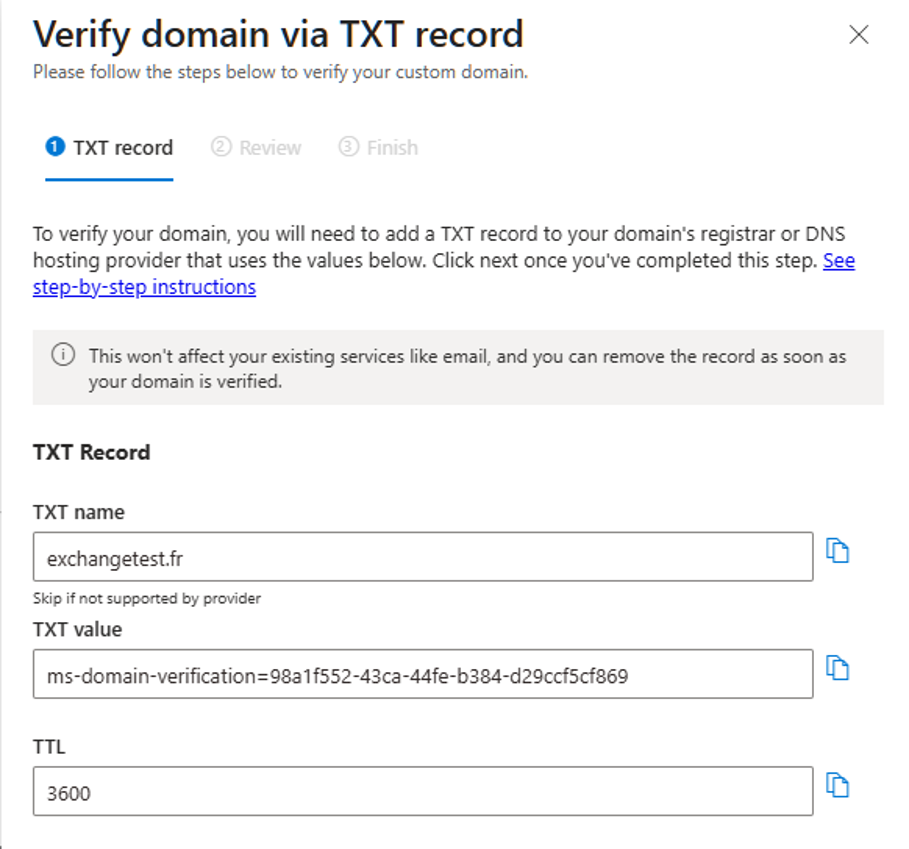
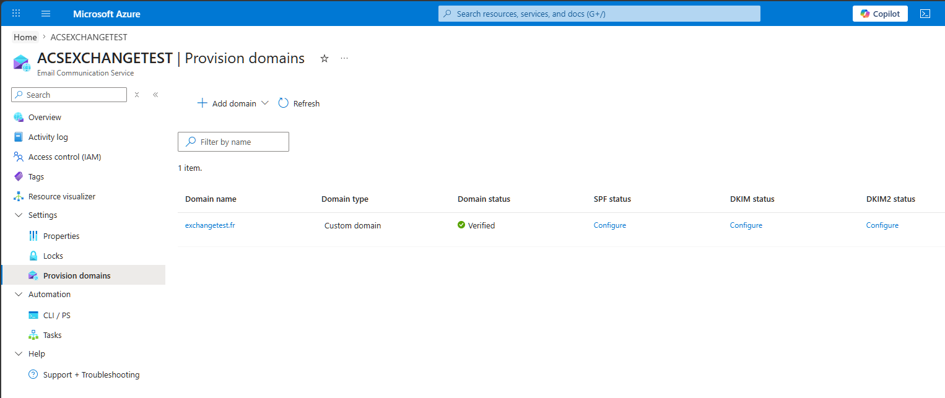
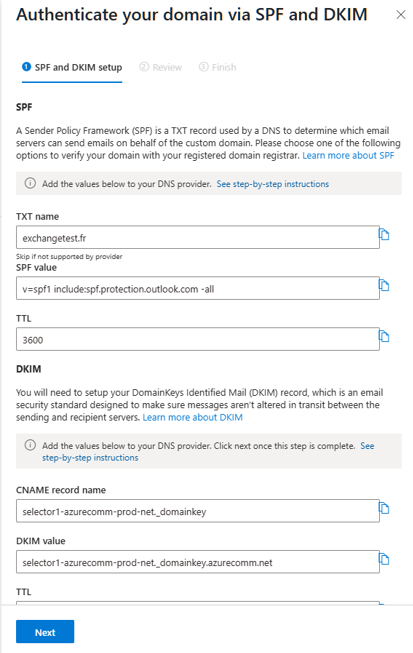
Once you declare the domain name, configure its SPF and DKIM protection. If the domain already exists in a Microsoft 365 tenant, simply create an additional DKIM record with new selectors.
Create a communication service
You can now create a Communication Service and connect the domain you defined in the Email Communication Service.
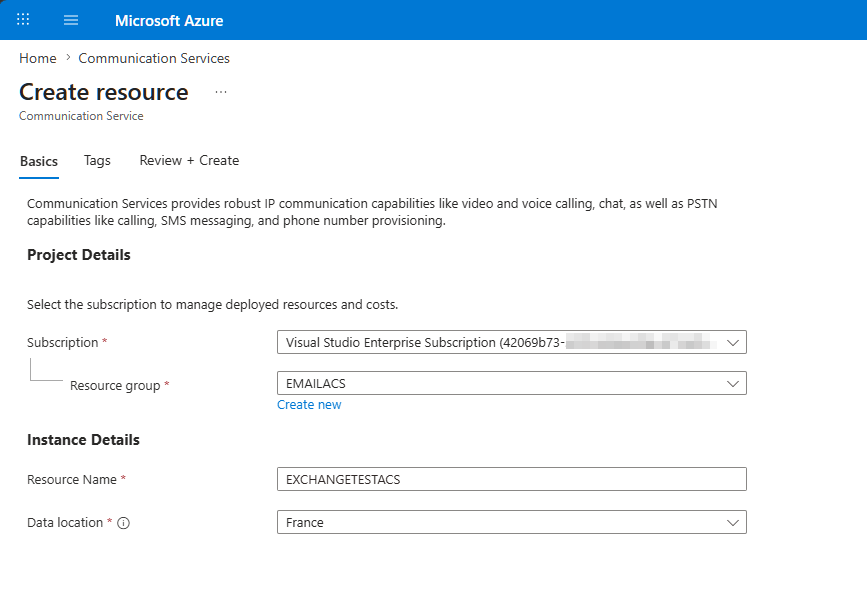
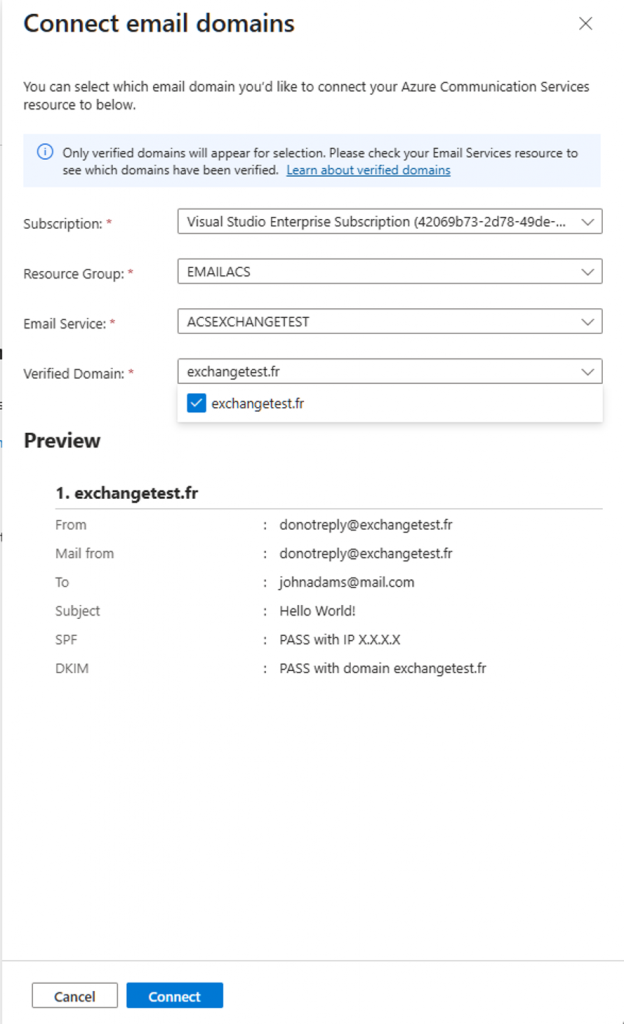
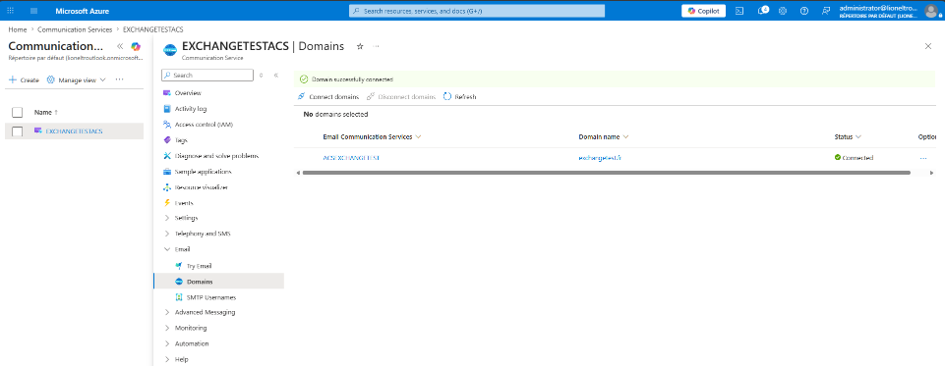
Note : At this step you can use donotreply@<yourdomain> as your first available sender address, and keep both the “From” and “Mail From” values identical.
Test send email with OAuth2.0
You can now run your first email sending tests with ACS, using both the graphical interface and scripts. These tests rely on APIs secured with OAuth2.0 authentication.
Access the graphical testing tool directly from the Communication Service.
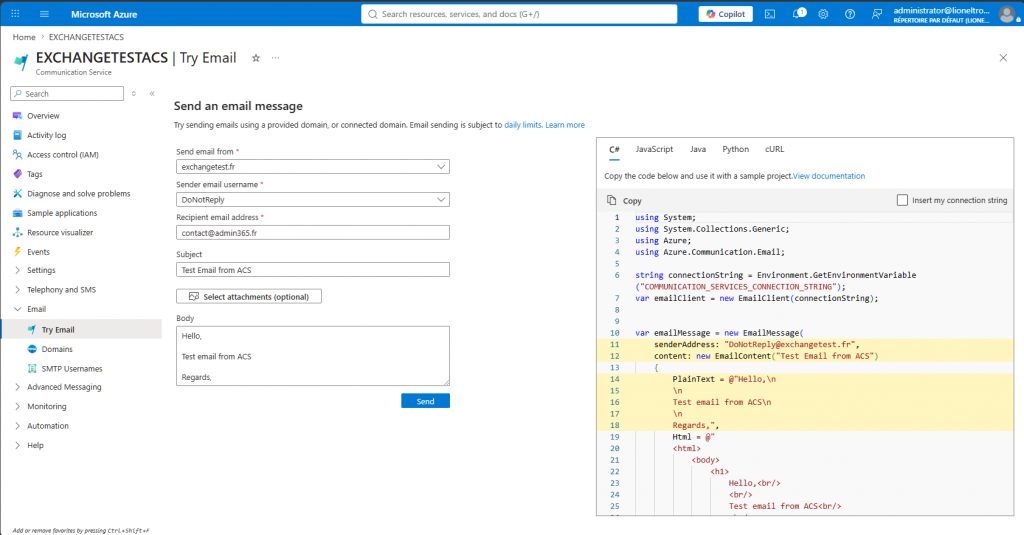
You can alse run a test in PowerShell using the Az PowerShell module and the example below.
Note : Find the communication endpoint in the Overview section of the Communication Service.
connect-AZAccount

$emailRecipientTo = @(
@{
Address = "contact@admin365.fr"
DisplayName = "contact"
}
)

$message = @{
ContentSubject = "Test Email ACS"
RecipientTo = @($emailRecipientTo) # Array of email address objects
SenderAddress = 'donotreply@exchangetest.fr'
ContentPlainText = "This is the first email from ACS"
}

Send-AzEmailServicedataEmail -Message $Message -endpoint <your_endpoint_communication_service>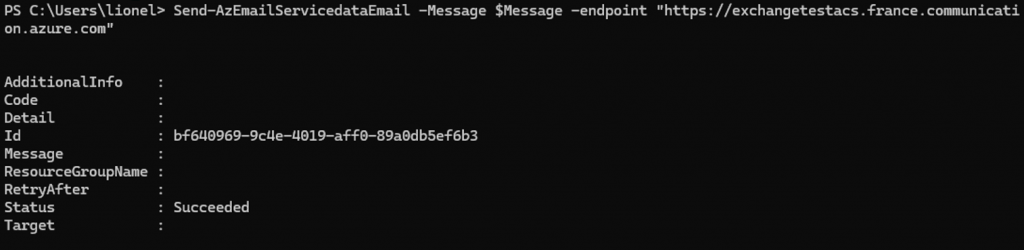
Increase domain limits and create other sender addresses
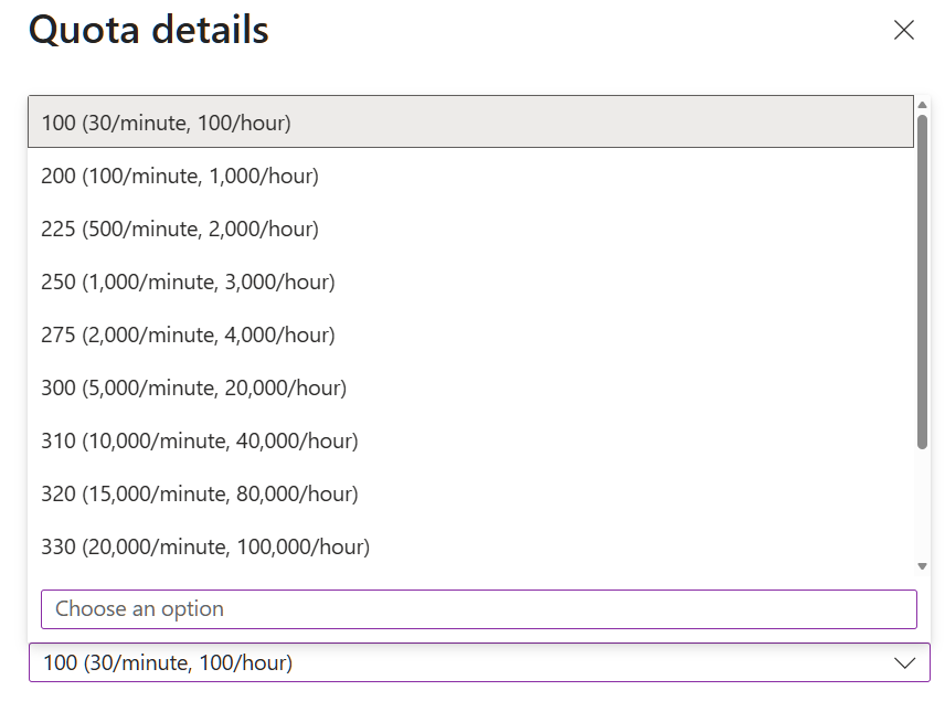
At this step, you can send emails only from the single “donotreply” address, with the following limits:
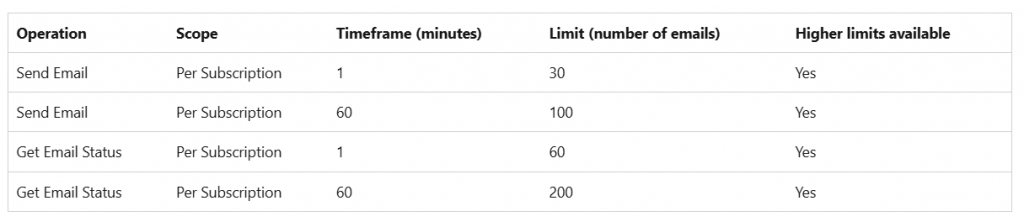
If you need to send emails from additional addresses or increase your sending volume, submit a quota increase request to Azure Support.
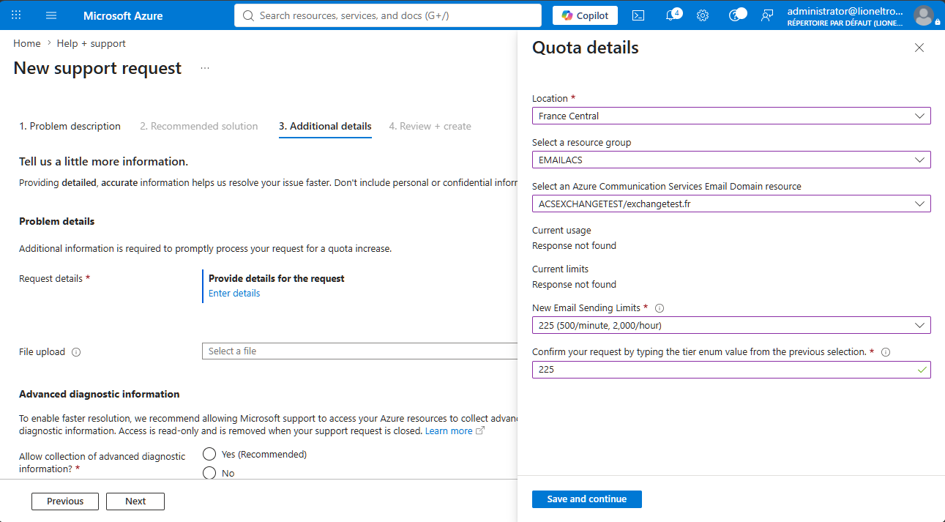
Create a support request with subject “quota increase”.
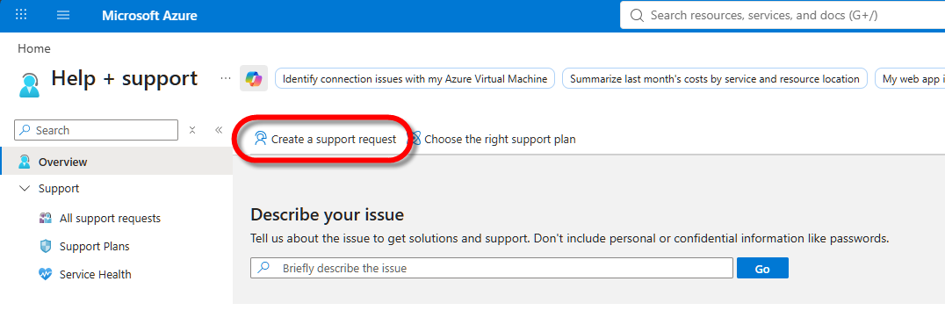
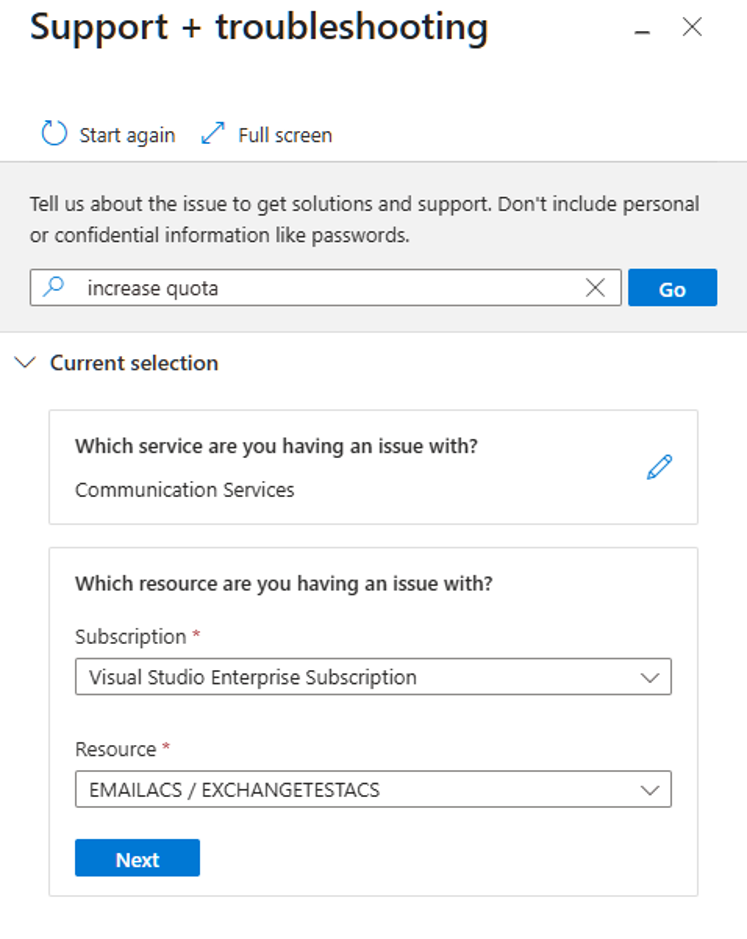
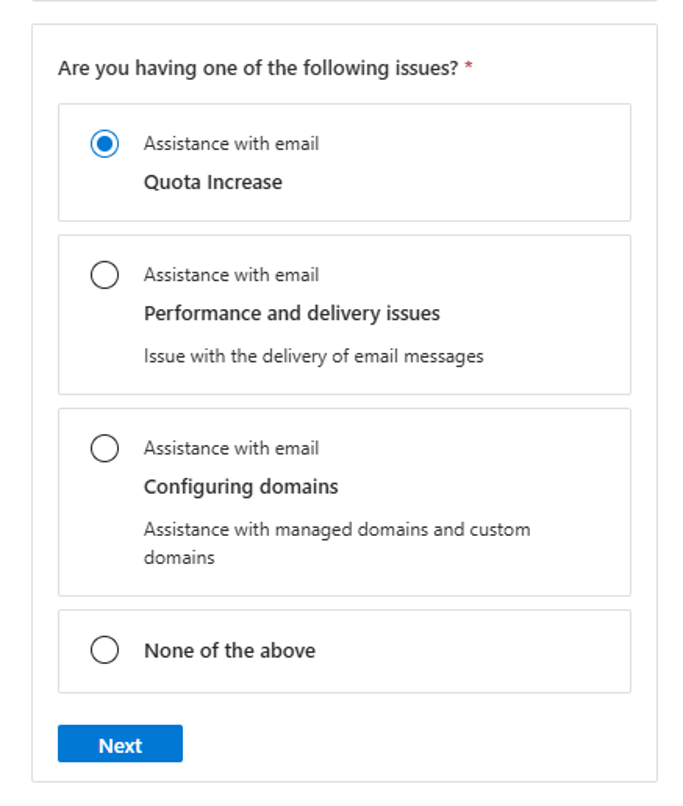
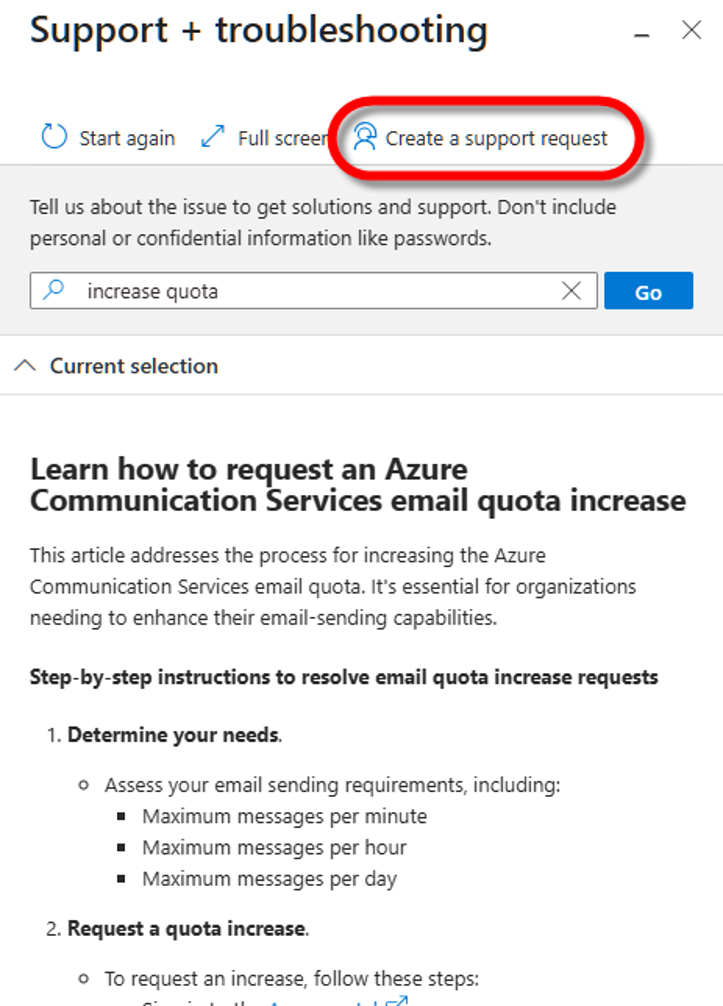
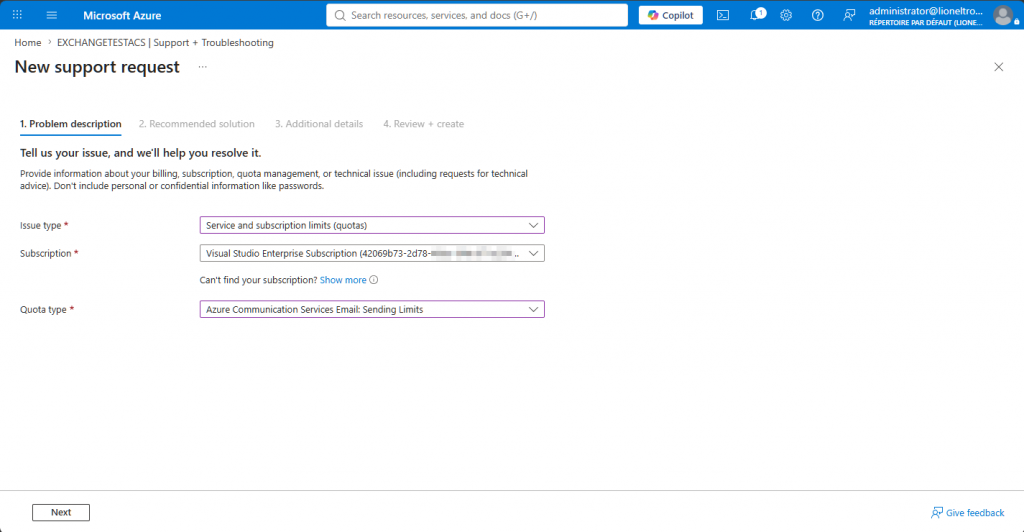
Select the issue type “Service and subscription limits (quotas)”. This type of request is free of charge.
Select quota type “Azure Communication Services Email Sending Limits”.
Select the quota details and attach a file with the information requested in the documentation https://learn.microsoft.com/en-us/azure/communication-services/concepts/email/email-quota-increase.
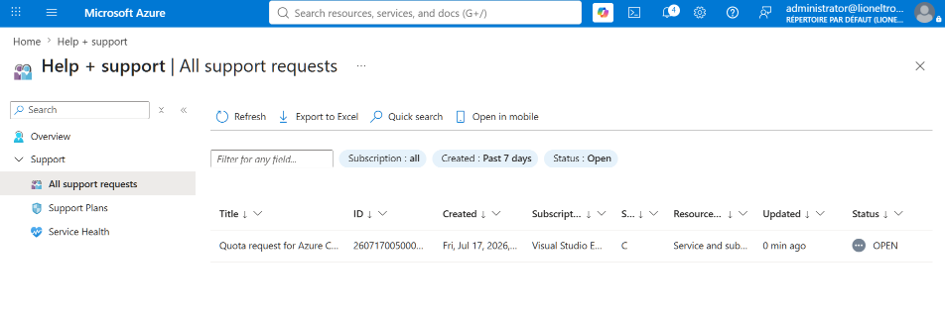
Wait the return of the Microsoft Support.
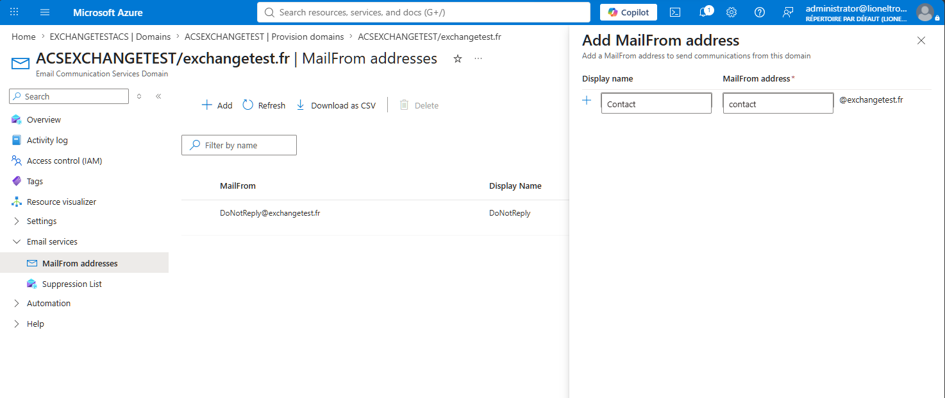
After this upgrade, you will have the new quotas and you will be able to create other “mail from” addresses.
Create APP registration with a secret
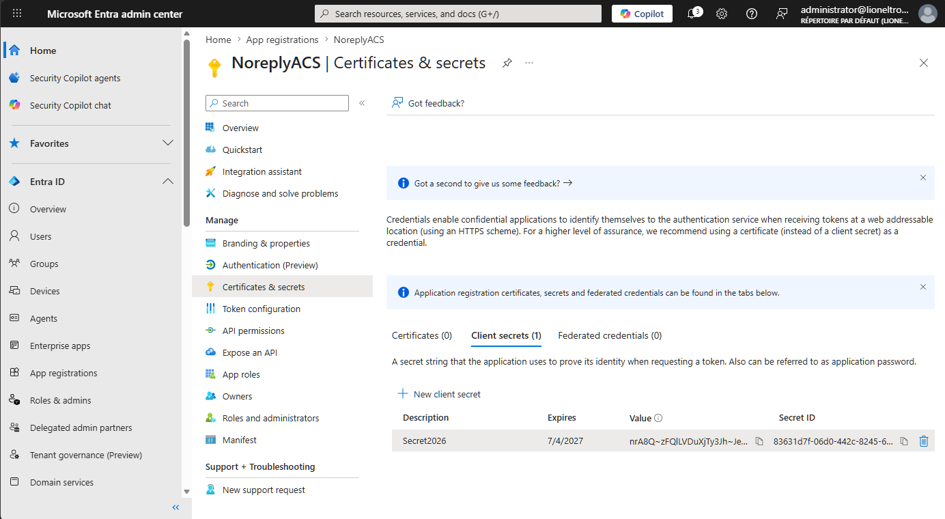
Now that your Azure Communication Services setup lets you send emails through APIs with OAuth 2.0 authentication, we will create an application that uses a secret for protection. This secret acts as a password and allows you to use ACS over SMTP with basic authentication.
Register a new mono tenant application without permissions.
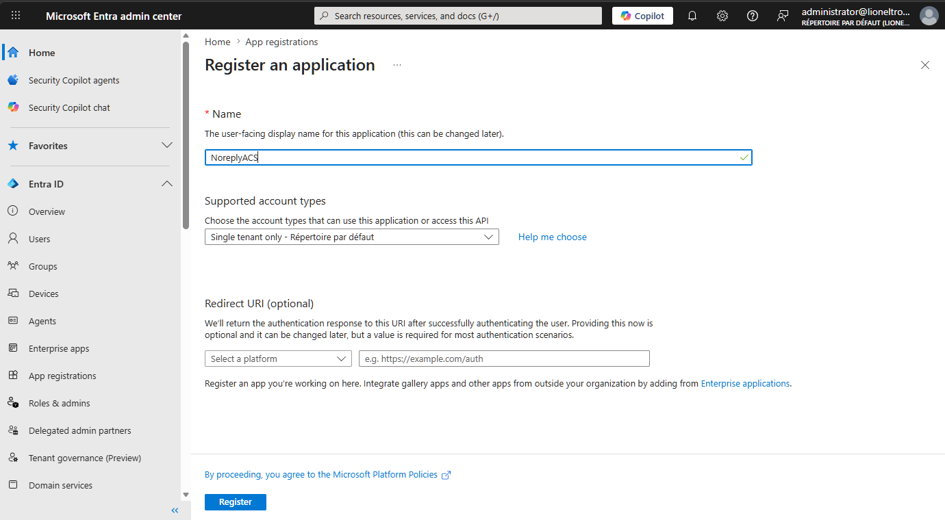
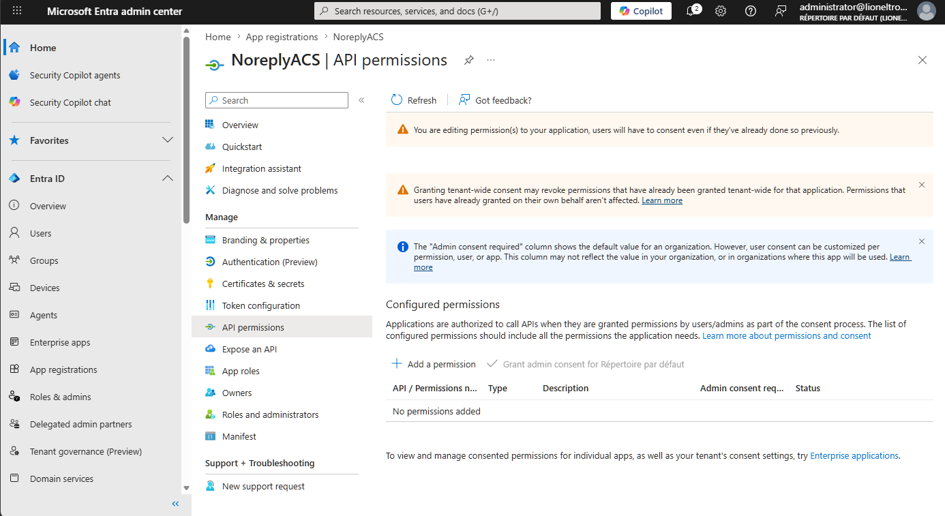
Note : Remove the default permission listed when an APP is created.
Create a secret.
Associate APP with an ACS user
Once you create the application, you must return to Azure and grant the application the required permissions on the Communication Service.
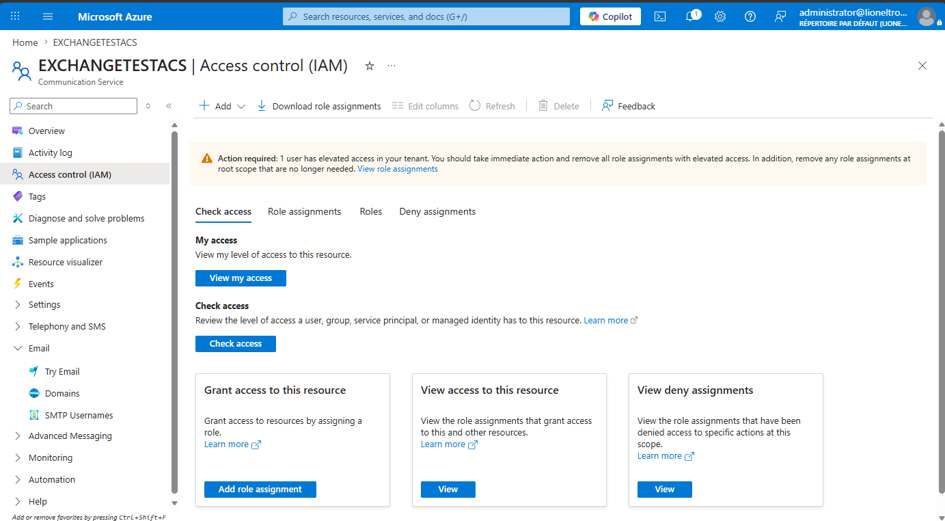
Assign the role “Communication and Email Service Owner”.
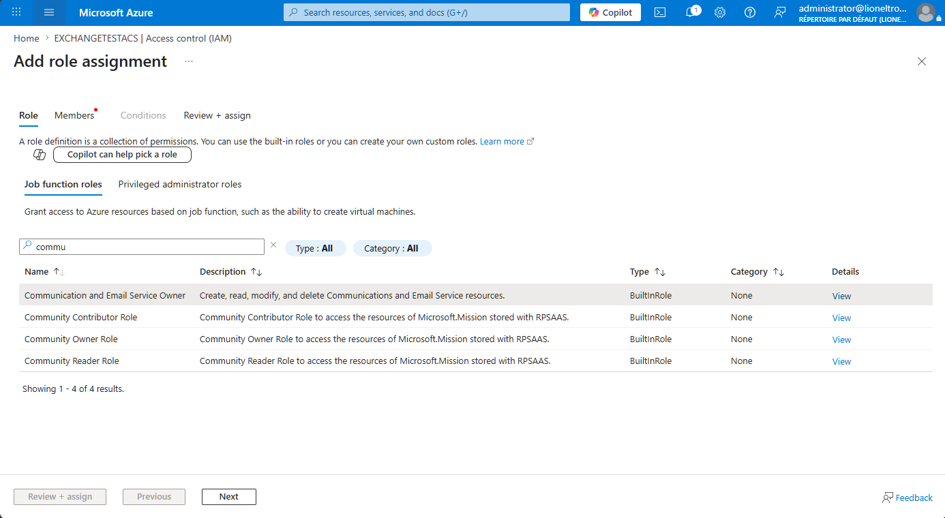
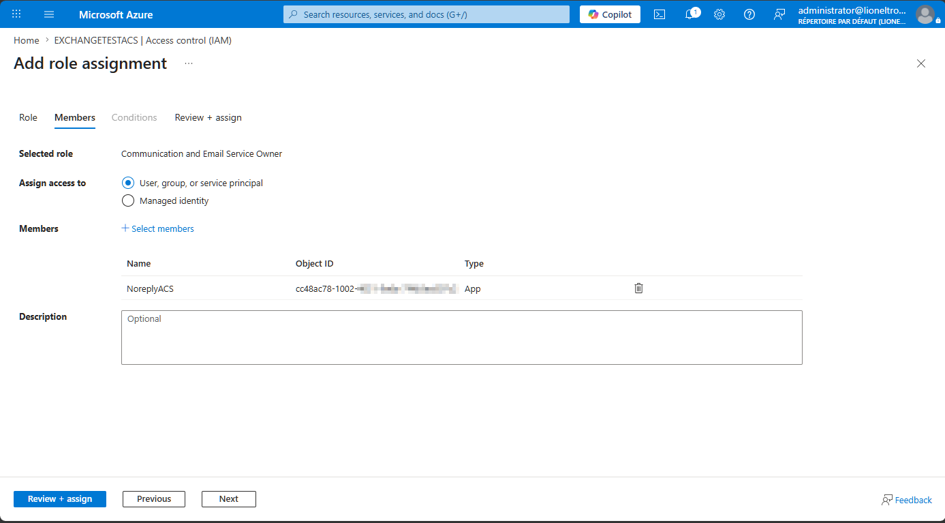
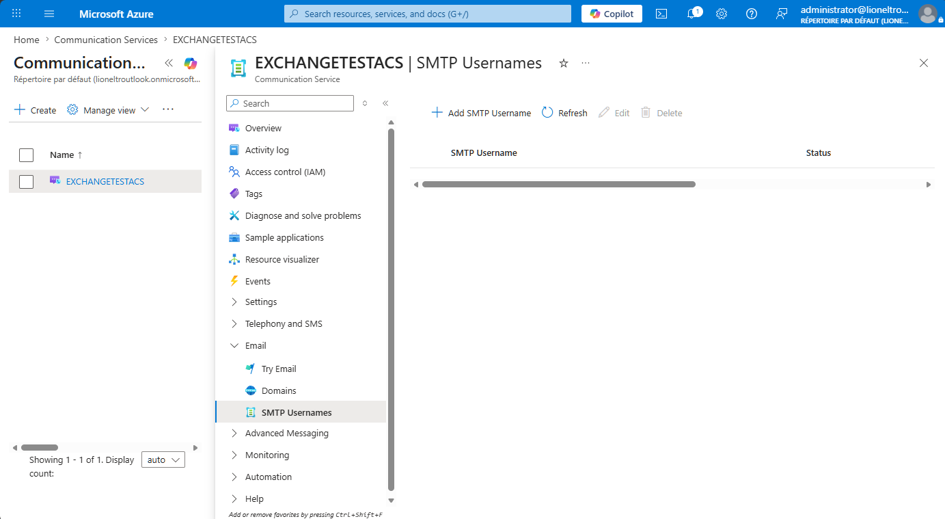
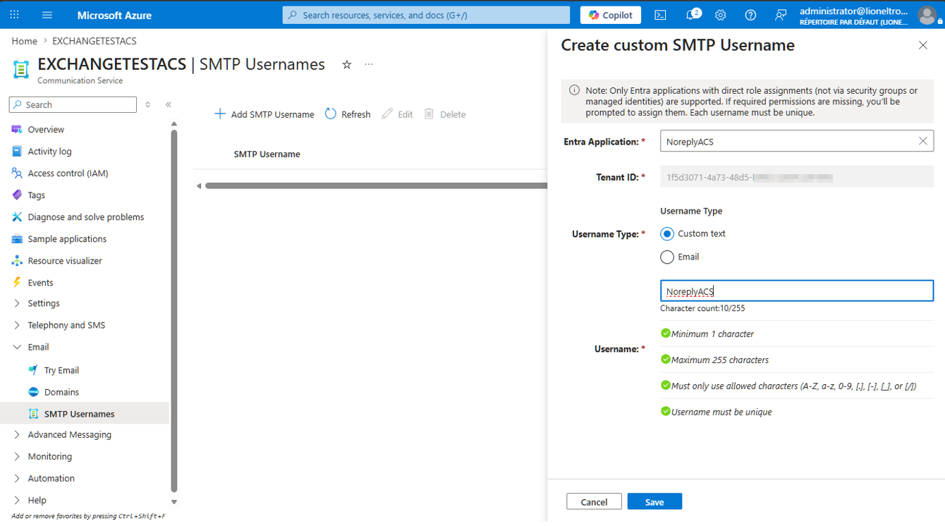
Once you assign this role, you must create a SMTP username in the Communication Service, associated with the service principal of the application protected by a secret.
This user serves as the login for SMTP connections with basic authentication, and the associated password corresponds to the application secret.
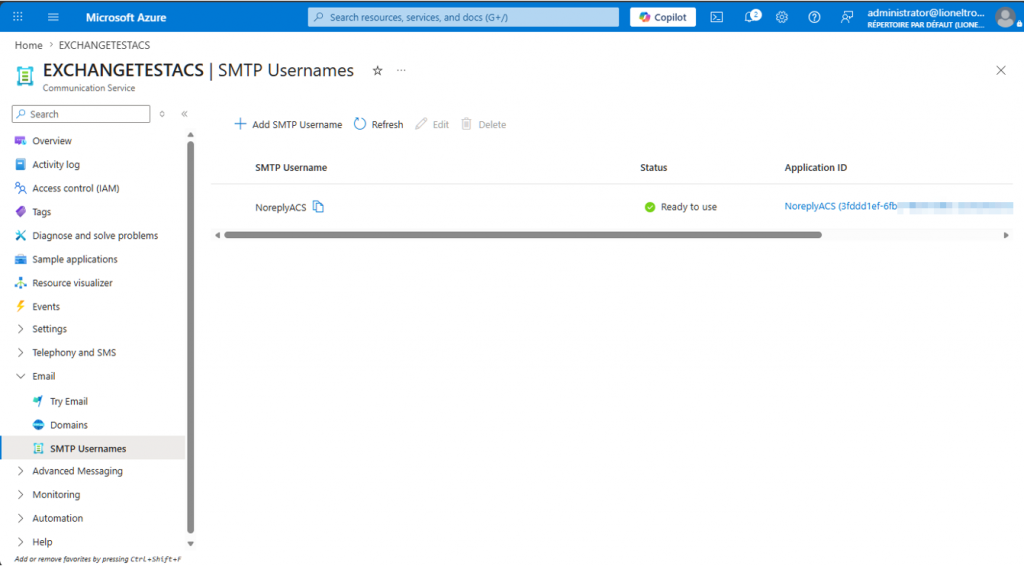
Send email with basic authentication
Use this account, with the secret as the password, to send an email through basic authentication with the following settings.
Server: smtp.azurecomm.net
Port : 587 (recommended) or port 25
StartTLS: Enabled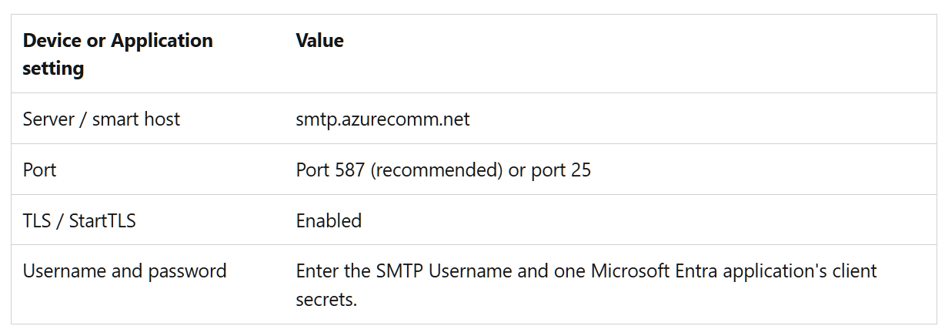
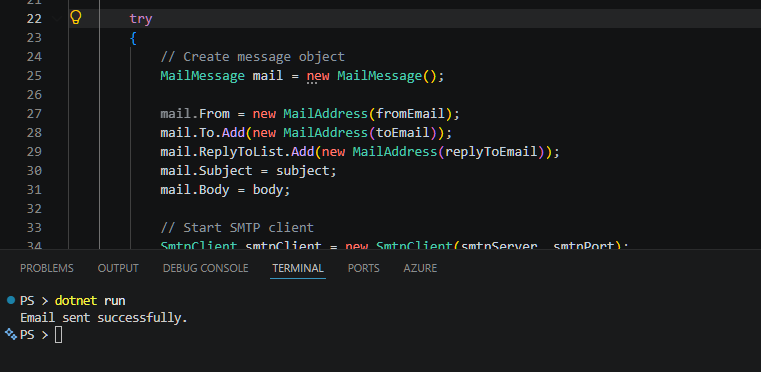
You can test with a C# code, that permits to define FROM, TO and REPLY TO fields.
using System;
using System.Net;
using System.Net.Mail;

class Program
{
    static void Main()
    {
        // SMTP parameters
        string smtpServer = "smtp.azurecomm.net";
        int smtpPort = 587;
        string smtpUsername = "<your_acs_account>";
        string smtpPassword = "<app_secret>";

        // Email information
        string fromEmail = "donotreply@<yourdomain>";
        string toEmail = "<recipient@domain.com>";
        string replyToEmail = "operator@<yourdomain>"; // here email address for reply to
        string subject = "Test Email with ACS SMTP";
        string body = "This is a test email sent using ACS";

        try
        {
            // Create message object
            MailMessage mail = new MailMessage();

            mail.From = new MailAddress(fromEmail);
            mail.To.Add(new MailAddress(toEmail));
            mail.ReplyToList.Add(new MailAddress(replyToEmail));
            mail.Subject = subject;
            mail.Body = body;

            // Start SMTP client
            SmtpClient smtpClient = new SmtpClient(smtpServer, smtpPort);
            smtpClient.Credentials = new NetworkCredential(smtpUsername, smtpPassword);
            smtpClient.EnableSsl = true; // Enable STARTTLS

            // Envoi de le-mail
            smtpClient.Send(mail);
            Console.WriteLine("Email sent successfully.");

        }
        catch (Exception ex)
        {

            Console.WriteLine("Failed to send email: " + ex.Message);

        }
    }
}
You can execute this code in “Visual Studio Code”.
You can verify that the received email shows successful SPF, DKIM, and DMARC checks.


Enable logs and statistics
Now that ACS allows you to send emails using basic authentication, you still need to configure one last component.
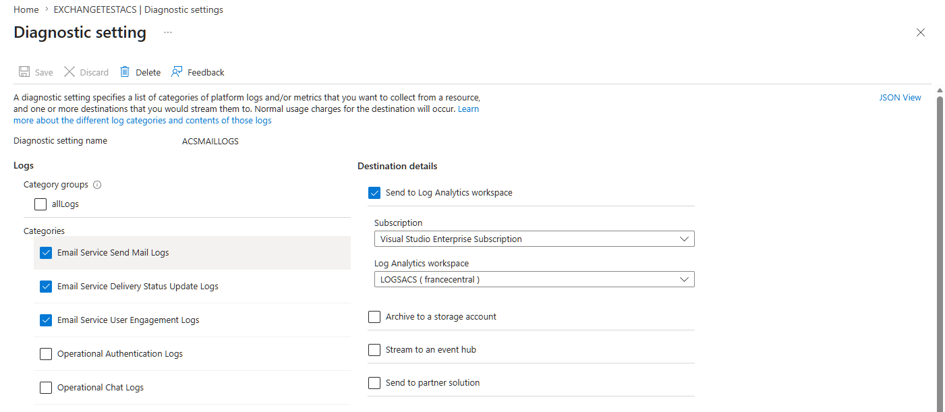
ACS does not natively include logging capabilities like Exchange does, so you must create a Log Analytics workspace and configure ACS to use it.
You must configure the Communication Service to audit the three actions whose names start with “Email” and send them to your Log Analytics workspace.
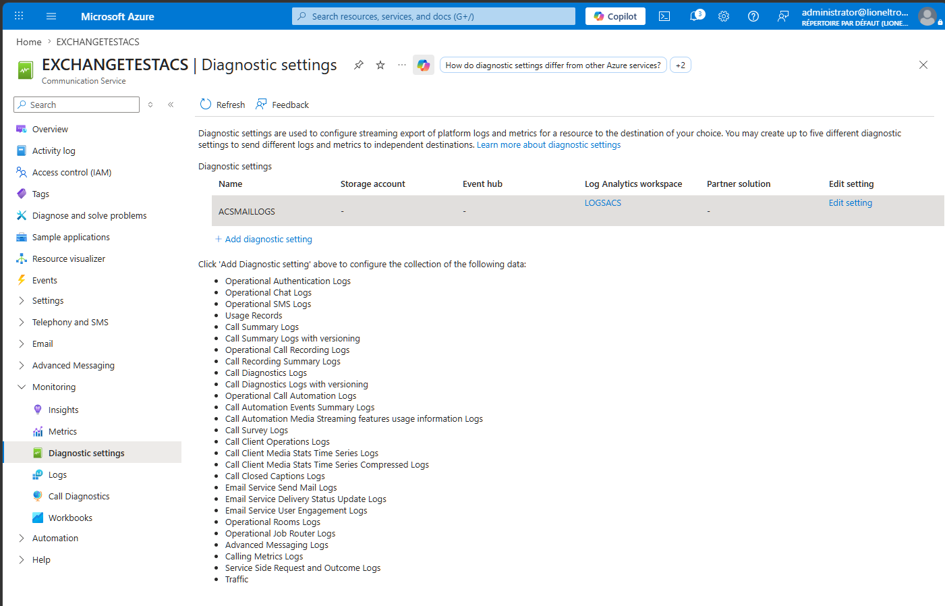
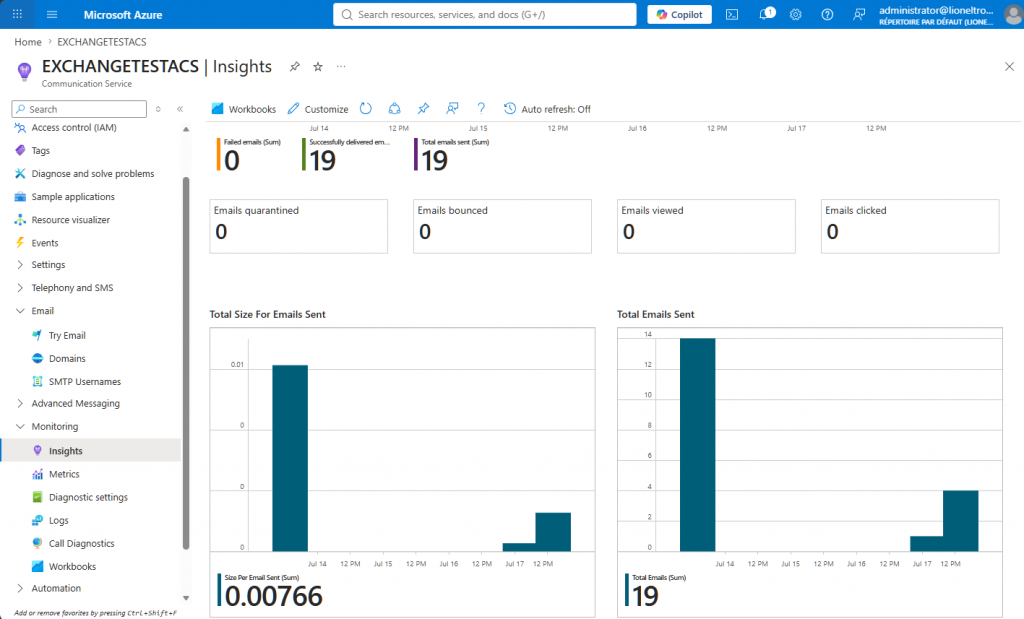
After a few minutes, the first logs will become available.
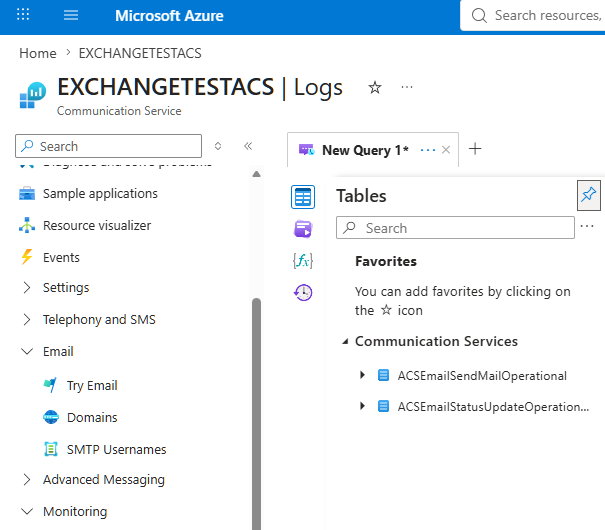
Two new tables in your Log Analytics workspace will store this information.
Total cost of the solution
The total cost of an ACS solution for sending emails includes the cost of sending emails and the cost generated by logging activities.
Email Pricing: https://azure.microsoft.com/en-us/pricing/details/communication-services
Logs Pricing: https://azure.microsoft.com/en-us/pricing/details/monitor
By Lionel TRAVERSE
Microsoft 365 Certified / MVP Microsoft 365 & Graph